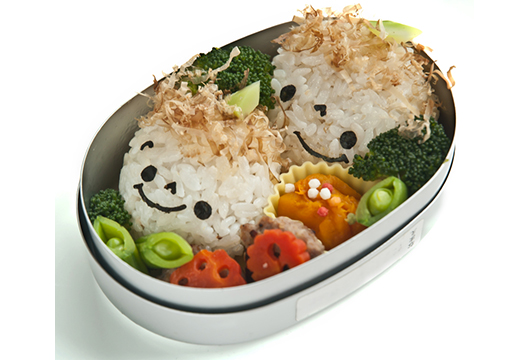
I remember my first lunch box as if it were just yesterday. It was a red and green plaid lunch pail with silver hinges that twinkled with the sunlight. Every day, I would open it and stare wide-eyed at its wondrous contents. I would find different things inside: carefully crafted sandwiches, colorful salads, and juicy pieces of fruit. A thermos, topped with a red cap that served as a cup, was the only ever-present item in my lunch pail, and that was fine by me. I loved the mystery of not knowing what hid inside my boxed treasure and the excitement of discovering its contents every time.
Assembling my own children’s lunches was always a pleasurable activity for me. I too, tried hard to turn their meal away from home into a loving and meaningful experience, even if it meant going to bed a little bit later each night or waking up just a tad earlier each morning. One thing was for certain—their lunch boxes were always ready on time and were always filled with interesting and fun goodies for them to enjoy.
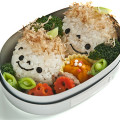
In Japan, homemade, packed lunches are known as Bento boxes. Traditionally, these always contain a portion of cooked rice, a vegetable (steamed or raw), a piece of fruit, and a little bit of protein in the form of fish, eggs or meat. These meals are served in boxed containers that have divided sections, to separate each lunch item from the next.
Today, you can purchase all sorts of portable boxes to send lunches packed in this style. Some are made of plastic, others are made with pretty lacquered wood, yet others are comprised of stackable metal boxes with clips that hold them together. However, and even though you may not find traditional Bento box containers where you live, you can still replicate the idea with a little bit of imagination. For instance, I use individual boxes and place them side by side in a traditional lunch box, or I divide a large plastic container—or the lunchbox itself—by wrapping cardboard dividers with aluminum foil and placing them whimsically inside. Just make sure that your box has a tight-fitting lid to secure its contents, in order to ensure that they don’t land all over the place during a bumpy bus ride or a happy skip down the hallways.
Read Related: Back-to-School: Healthy Whole Grains for the Lunchbox
Lunches that follow the premise of Bento boxes can be fun to make, particularly when it comes to children’s meals. Many of the food items can be cut into shapes, including sandwiches, vegetables, fruits, and cheese. Use cookie cutters to transform them into stars, animals, or flowers. If you choose to include a rice portion, use short grain rice that holds together after it’s cooked, and shape that into shapes that can be decorated with edible garnishes. Transform them into cute little faces or sports balls by using cut-up vegetables, olives, seeds, or nuts. Imitation crab meat, ham, rotisserie chicken or cooked pork, can be cut into batons or cubes and provide a source of protein. Tuna or egg salad can be shaped into scoops and tortilla wraps can be sliced into pretty pinwheels.
The next time that you plan your child’s school lunch, don’t think out of the box. Instead, make a Bento boxed lunch—the kind that will make your child’s eyes open in wonder and their tummies feel very happy.
Author’s Note: Keeping food at the optimum temperature is important in order to prevent food-borne illnesses. For this reason, I recommend that you place a frozen pack into your child’s lunchbox and if possible, use insulated lunchboxes that keep foods cold longer.
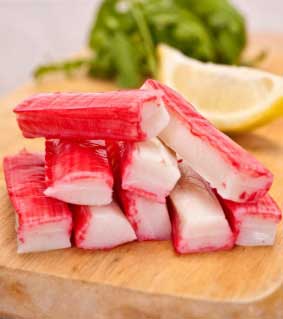
This is the perfect way to introduce kids to the concept of sushi and a great addition to a Bento box. Serve this with sliced oranges, and carrot cut-outs. Its presentation is simple but colorful. This rice is easy to shape into any form you wish to give it, once it reaches room temperature. Very small kids may want to keep all of the ingredients separate; in this case, place mounds of plain rice, imitation crab sticks, and sliced cucumbers separately in the lunch box.
MINI SUSHI BALLS
Makes: 4-5 servings
Ingredients
1 cup sushi rice
1¼ cups cold water
¼ cup seasoned rice vinegar
2 TSP sugar
1 TSP salt
1¼ cups finely cubed imitation crab meat (surimi) or ham
¾ cup finely minced English cucumber (seeded)
Low-sodium soy sauce
Instructions
- Place the rice in a strainer; rinse under cold water until the water runs clear. Drain well.
- Transfer rice to a medium saucepan and add the cold water (if using a rice maker, follow the machine’s directions). Bring water to a boil; reduce heat to low and cover rice, simmering it for 20 minutes or until all of the water has been absorbed.
- Remove the pot from the heat and allow the rice to sit, undisturbed and covered for 10 minutes.
- In the meantime, place the vinegar, sugar and salt in small saucepan and place it over low heat; stirring until most of the sugar and salt have dissolved. Transfer the rice into a medium glass bowl, and carefully stir in the vinegar mixture, cutting it into the rice until well mixed. Cover the bowl with a damp, clean towel and let it cool to room temperature, for about 15 minutes.
- Stir the cucumber and imitation crab meat (or ham) into the rice, stirring gently. Dip a ½ cup measuring cup into cold water and fill it with the rice mixture, packing it down tightly. Unmold and repeat with the rest of the rice, making sure to dip the cup in water each time. Place the shaped rice into each Bento box. Place a tiny container or package of soy sauce on the side, for dipping.
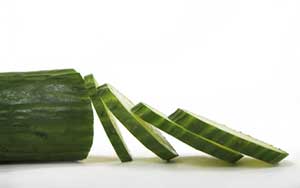
If your child loves pickles, try this recipe for a sweet and sour version that is sure to please. English cucumbers are almost seedless and their skins have not been dipped in wax—unlike traditional cucumbers—which renders their green skins completely edible. I core the cucumbers, and then use a sharp knife or an apple corer to remove the seeds entirely. Make these right before packing them into lunchboxes, or assemble the recipe the night before.
QUICK PICKLED CUCUMBER RINGS
Makes: 4 servings
Ingredients
1 large English cucumber
¼ cup seasoned rice vinegar
2 TSP sugar
1 TSP low-sodium soy sauce
1 TSP vegetable oil
¼ TSP salt
Instructions
- Remove the cucumber from its wrapping and wash well under cold water.
- Trim the ends and cut the cucumber into 3 or 4 long chunks. Use an apple corer or a knife to remove the seeds. Cut the cucumber into ¼ -inch slices and place them in a medium bowl.
- In a small bowl, stir together the vinegar, sugar, soy sauce, oil, and salt, until the sugar is dissolved; add this to the cucumbers and mix well. Cover and refrigerate for at least 20 minutes (up to overnight).
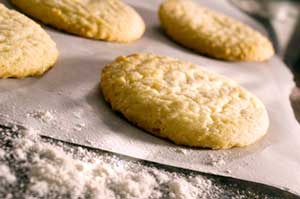
These are scrumptious cookies, for those days when you want to send the kids a special treat in their lunch boxes. The cookie dough can be baked ahead of time and the unfilled cookies can be frozen for up to 2 months. Just pull out the number of cookies you’ll need from your freezer, fill, and decorate. For kids with peanut allergies, skip the peanut butter and double up on the jelly.
PEANUT BUTTER & JELLY BUTTONS
Makes: 16 cookies
Ingredients
1½ cups all-purpose flour
½ cup powdered sugar
Pinch of salt
1 stick plus 1 TBSP unsalted butter, at room temperature
1 egg yolk
1½ TSP vanilla extract
¼ cup peanut butter
¼ cup jelly (your favorite)
2 oz melted dark chocolate
Instructions
- In a large bowl, combine the flour, sugar and salt; mix well.
- Add the butter, egg yolk and vanilla, mixing with your hands until the dough holds together in a ball.
- Divide the dough in half, press into discs and wrap well with plastic; chill in the refrigerator for 2 hours.
- Roll dough out to ¼ inch thick and using a 2 ½ -inch round cookie cutter, cut out 32 round shapes. Re-roll dough, if necessary to make all of the circles. Place cut outs on cookie sheets lined with parchment paper and chill for 10 minutes (or up to 24 hours) before baking.
- When ready to bake, preheat the oven to 350°F.
- Bake cookies for 8-10 minutes or until edges begin to turn golden. Cool cookies completely on wire racks. Spread half of the cookies with ½ teaspoon of peanut butter; top that with ½ teaspoon of jelly. Sandwich the cookies together, with the filling inside. To melt the chocolate, place the chocolate in a zip-top bag and microwave on high for 20 second intervals until the chocolate has melted. With scissors, cut open a small hole at one end of the bag and pipe 4 dots on each cookie. Let the cookies dry on cookie racks before storing.





Leave a Reply
Want to join the discussion?Feel free to contribute!