

Depending on your surroundings, sometimes a standard photograph won’t quite cut it to truly do justice to the image you want to capture. Sometimes a panoramic photo is the only way to go, but if you’re not a seasoned photographer it can be intimidating to work in pano mode. Let’s break it down so that anyone—yes even you—can rock a panoramic photo with ease. For starters, you need to understand what a panoramic photo is to know how to use this photography technique. According to Nasim Mansurov, a Denver, Colorado-based professional photographer and founder of Photography Life, “panoramic photography, also known as wide format photography, is a special technique that stitches multiple images from the same camera together to form a single, wide photograph (vertical or horizontal). The term “panorama” literally means “all sight” in Greek and it first originated from painters that wanted to capture a wide view of a landscape, not just a certain part of it.”
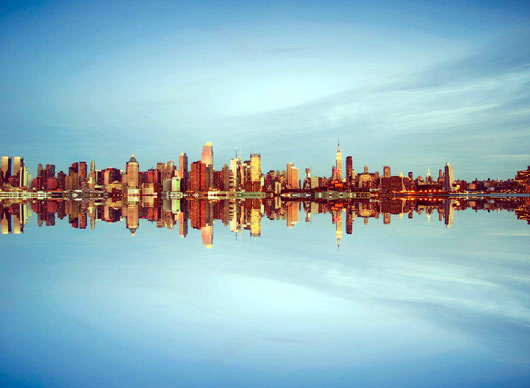
Imagine you are standing at the top of a mountain and you want to capture everything as far as the eye can see…you need to take a panoramic photo, because one frame won’t cut it. Or if you’re trying to capture an expansive city skyline that seems to go one for many miles…you need to take a panoramic photo.
Now, many point-and-shoot cameras (which is probably what your basic digital camera is, or your cell phone camera for that matter) have a panoramic mode, which makes this process really simple. You literally switch format modes, and suddenly your frame becomes twice as wide, allowing you to snap a massive, all-encompassing photo with one click. That’s the easy way to do it, and it works. But if you are using a fancier camera setup, such as a DSLR camera (which stands for digital single lens reflex), then it takes a bit more skill and patience to get a panoramic shot right.
Read Related: Delve Into Dusk: 10 Lessons You Will Always Learn from Sunsets
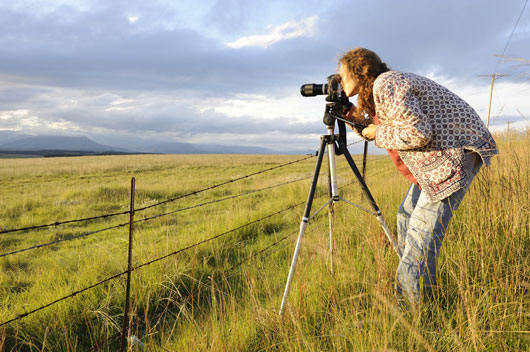
Photography expert David Peterson explains that “you will need four tools: 1) a tripod, 2) a camera with manual mode 3) a fairly middle-of-the-road lens, since a wide angle lens will create distortion that will make it difficult to stitch your image together later on and 4) Photoshop Elements with the Photomerge utility.”
A tripod is necessary so you can accurately capture each frame that you plan to stitch together and so that the seams between each frame will be smooth and continuous. Manual mode in your camera will allow you to choose your camera’s settings and ensure that they stay consistent for each image you take. A panoramic photo will not work if each shot has different lighting and exposure, since your ultimate goal is for all photos to be stitched together to look like one seamless image. Automatic settings often adjust to the lighting, which can shift drastically as you move your camera across a panoramic scene. To be safe, manually focus your lens and settings.
As you begin taking your photos, make sure you overlap each image slightly so that you don’t accidentally leave anything out of your final shot. A good rule of thumb is to make sure that each image you capture overlaps by at least 20% from the previous shot, and that there are objects in each shot that are stationary, so you have points of reference to work with as you stitch the photos together.
Once you have all the shots you want to work with, the stitching software you choose will do the rest of the work. Photoshop software works great, and in general what they do is find the common pixels and bring the edges together. When they’ve done that you can crop the tops and bottoms as you choose. You essentially do a photo merge, where you select all the photos you want to combine into a panoramic shot, and the digital tool will then blend the images you select together into a single shot.
While panoramic photography isn’t always necessary, it can certainly make a big impact and the result is a work of art that accurately represents the scene you are trying to capture. It’s easy to do if you know where to start, and once you learn how to do it, the photo possibilities are endless.